Using Bodychart in EMR #
Bodychart is a visual representation of the human body that is used to annotate diagnoses, procedures and biopsies. In Legend, it is available in the EMR module. This document is a guideline to use the bodychart effectively.
Mouse Controls #
You can navigate the bodychart using mouse controls in the following way:
Left button #
The left button on the mouse is used to move the bodychart on a 360 degree axis, or in a 3D space. You can click and hold this button and rotate the body in any direction.
Right button #
The right button on the mouse is used to move on 180 degree axis or in 2D space. You can move up, down, right and left in a two-dimensional space using this button.
Wheel #
You can zoom in and out on bodychart using the wheel of the mouse.
Bodychart Interface #
The bodychart opens in a window that has the following elements:

Body #
The bodychart window displays a human body. Depending on the gender and age of the patient, it displays one of the following:
- Female child
- Male child
- Adult female, or
- Adult male
Buttons #
The bodychart window has the following buttons:
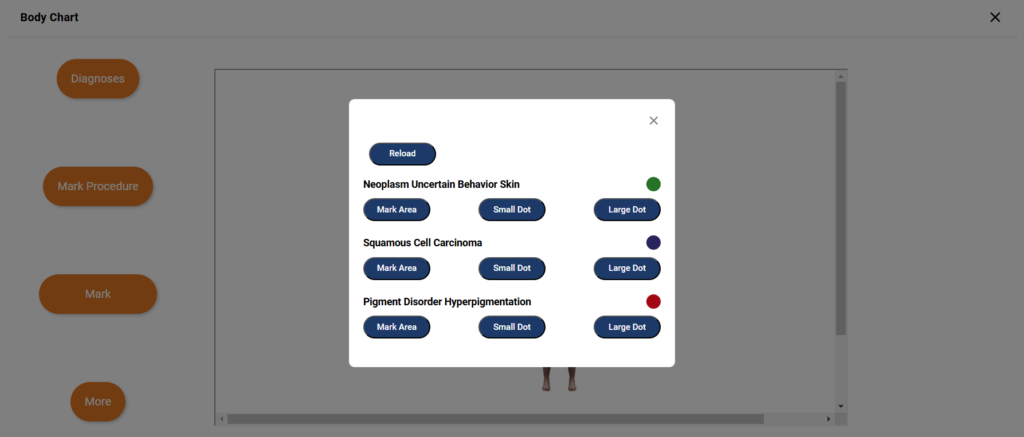
Diagnoses #
This button opens a pop-up that has all the diagnoses that have been added to the patient chart
Diagnoses pop-up
- The diagnoses pop-up lists all the diagnoses added to the patient chart
- Each diagnosis has a color associated with it
- Each diagnosis has three options for annotation:
- Small dot
- Large dot
- Mark area
- There’s a reload option to accommodate any changes that have been made to the diagnoses in the chart
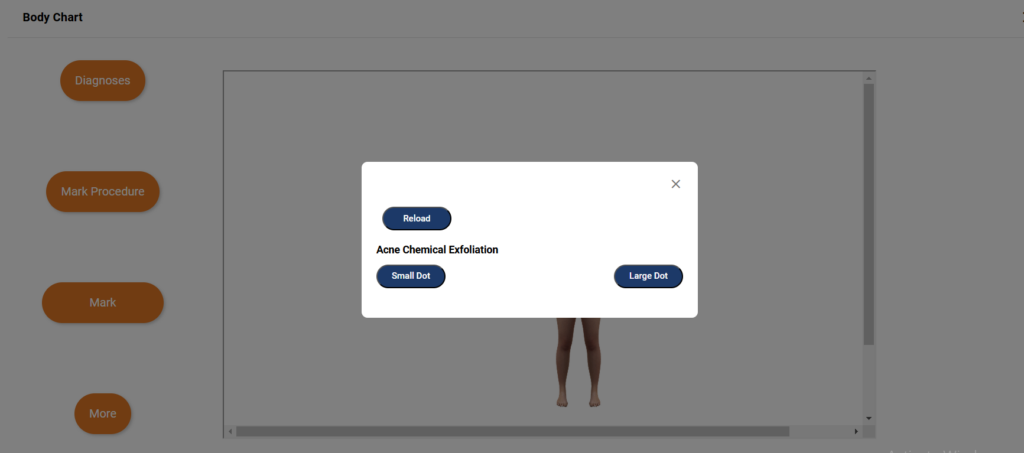
Mark Procedure #
This button opens a pop-up that populates all the procedures that have been added to the chart
Procedure pop-up
- The procedure pop-up lists all the procedures added to the patient chart
- Each procedure has a color associated with it
- Each procedure has two options for annotation:
- Small dot
- Large dot
- There’s a reload option to accommodate any changes that have been made to the procedures in the chart
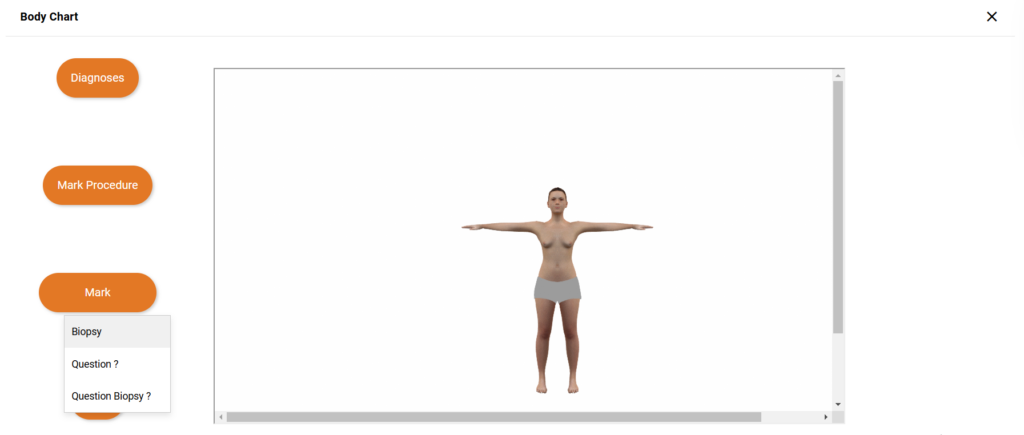
Mark #
This button displays drop-down options to mark and question biopsies
More #
This button opens a sidebar that has a number of settings and options related to the bodychart
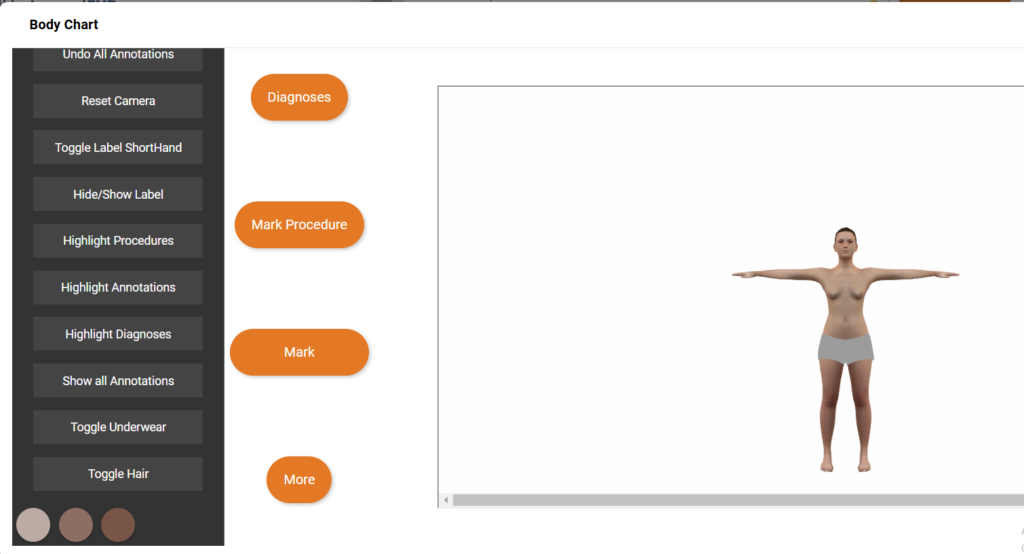
Undo all annotations #
It erases all the annotations from the bodychart
Reset camera #
It resets bodychart to its original position
Toggle Label Shorthand #
It is used to switch between abbreviations and full forms of annotation labels
Hide/Show label #
It is used to hide of show the labels, i.e. diagnoses or procedure names with annotations
Highlight procedures/annotations/diagnoses #
These options are used to highlight all the procedures, biopsies and diagnoses in the bodychart
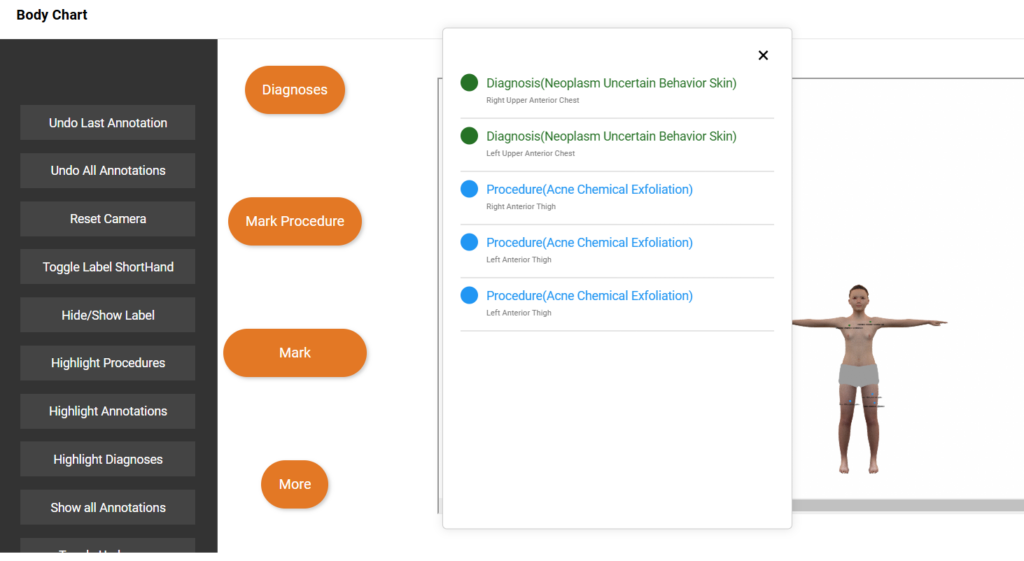
Show all annotations #
This options opens a pop-up that displays all the annotations marked on the bodychart.
Toggle hair/underwear #
These can be used to take off and put on hair or underwear on the bodychart
Skin colors #
The skin color of the bodychart can also be changed using the color options at the very bottom of the sidebar.
Annotating Diagnoses #
When diagnoses are entered into the chart, they are automatically populated in the bodychart. To annotate the diagnoses on the body, follow the steps:
- Click on the Diagnosis button
- System displays the diagnosis pop-up
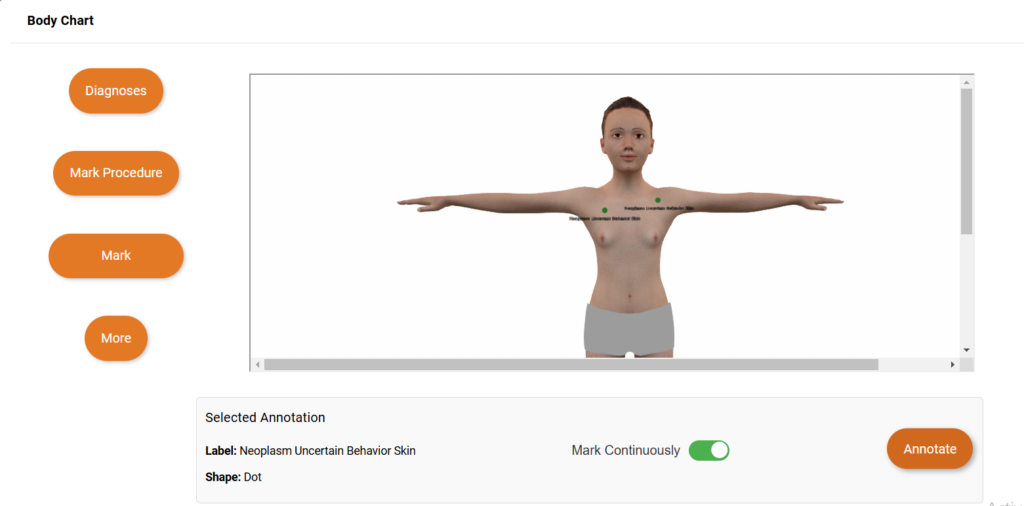
- For the diagnosis that you want to annotate, select the appropriate annotation option (small dot, large dot, mark area)
Mark continuously #
- Upon selecting the option, system displays the option to Mark continuously
- If you want to mark the diagnosis multiple times on the body, toggle on the mark continuously toggle button
- Click on the Annotate button and start marking the diagnosis on the body
- You can rotate the body, move up, down, right and left using the mouse controls as explained above
- Once done marking, click on the Stop button
- The diagnosis will start appearing on the body with the color associated with it
Mark once #
- If you want to mark a diagnosis only once, toggle off the Mark Continuously button
- Click on Annotate button
- Mark the diagnosis on the body
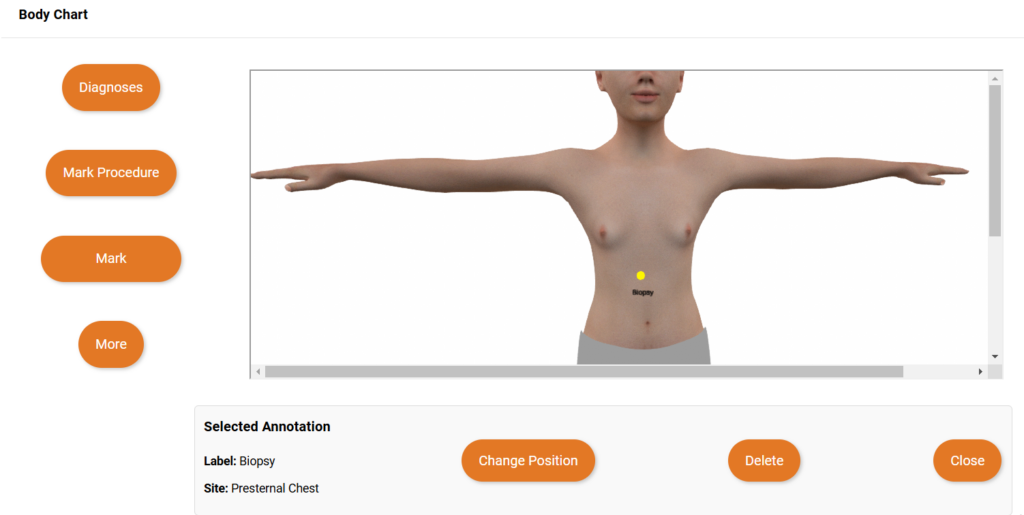
Change position and delete diagnosis #
To change the position of a diagnosis:
- Click on the annotation
- System displays option to Change Position
- Move cursor to the part of body where you want to annotate
- Click on Change Position button
- Mark the annotation
- Position of the Annotation will be changed
To delete a diagnosis:
- Click on the annotation
- System displays button to Delete diagnosis
- Click on the button
- Diagnosis will be deleted
Annotating Procedures #
Annotation of procedures has the same steps as annotating diagnosis.
Marking Biopsies #
To mark biopsy on the bodychart:
- Hover over to the Mark button
- System displays a drop-down menu of options to mark biopsies
- Click on Biopsy
- Click on the Annotate button
- To mark more than once, toggle on Mark Continuously button
- Click on the body part where you want to annotate biopsy
- You can also change its position and delete it like diagnosis and procedures.