Table of Contents
Add a Patient Education in Settings #
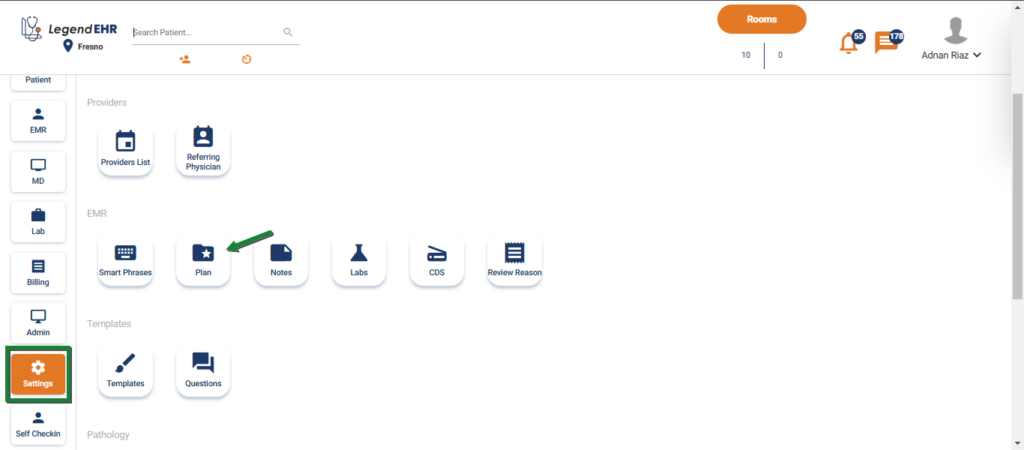
- Navigate to Settings -> EMR.
- Click on the Plan.
- Click on the Patient Education.
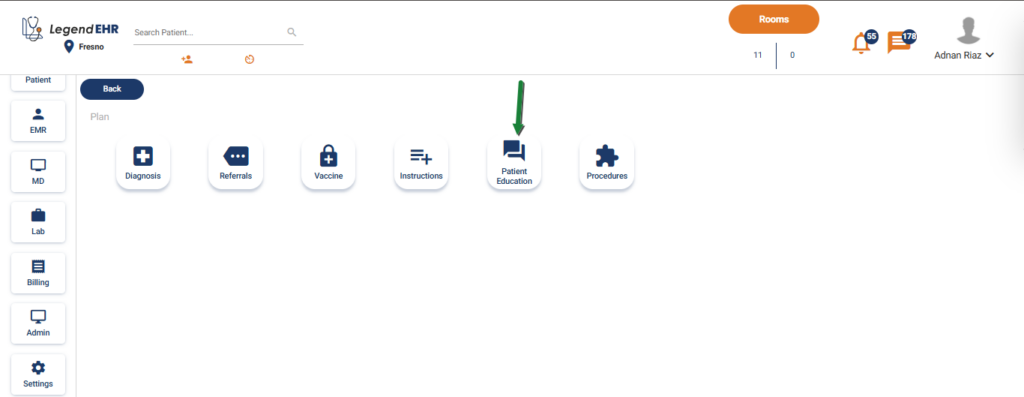
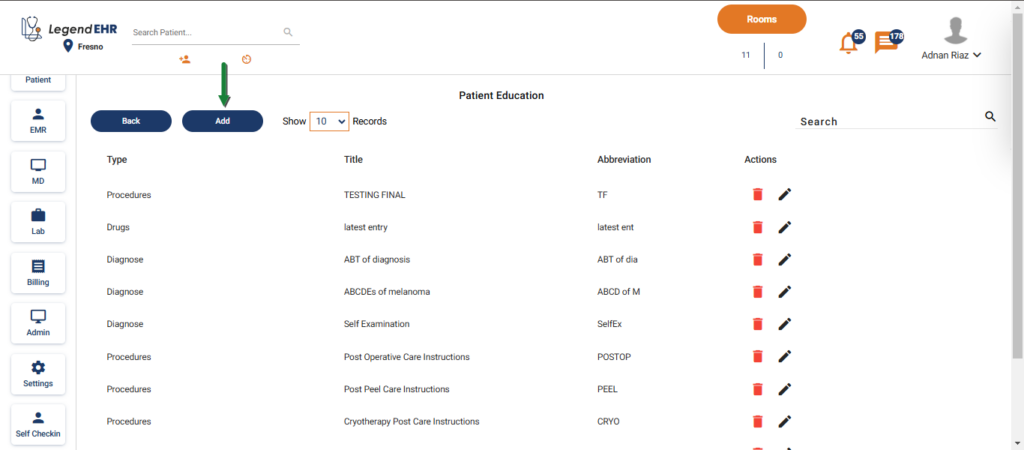
- Patient Education will be opened.
- Click on the Add button to add a new Patient Education.
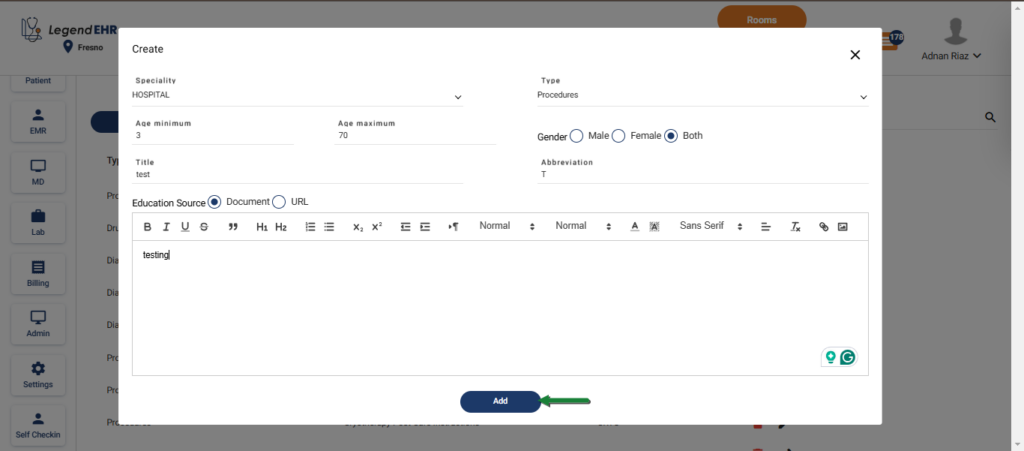
- There are two types of Patient Education; Document or URL. Select one with the radio button.
- Fill in all the details.
- Click on the Add button.
- The Patient Education is added successfully.
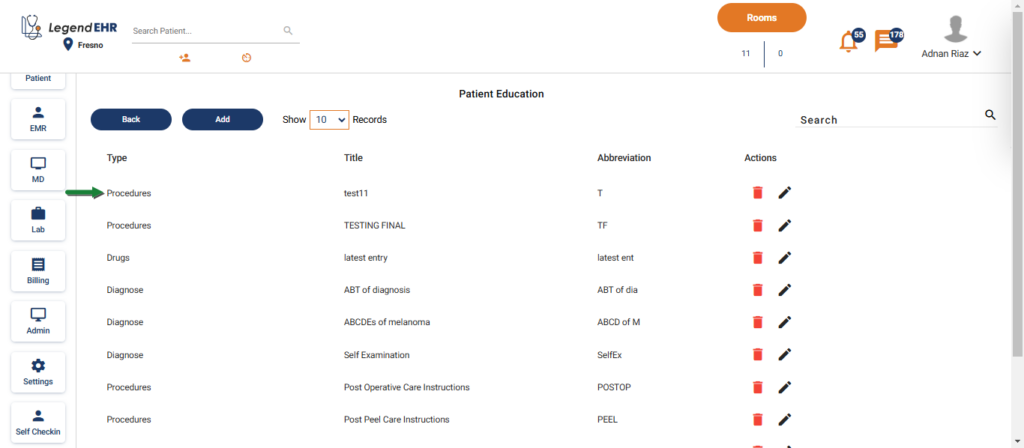
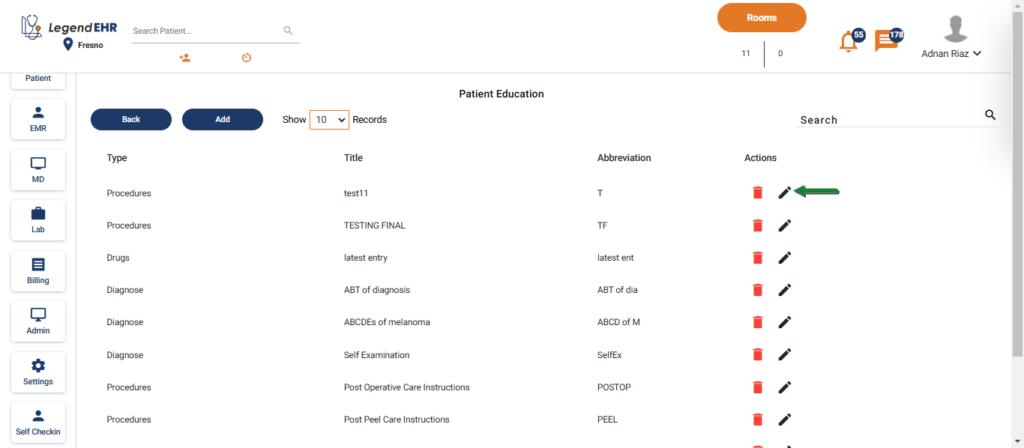
- You can also Edit or Delete a Patient Education by Edit or Delete icons respectively under Actions.
Add a Patient Education in EMR #
- Select the Patient and navigate to EMR -> required Progress Note.
- Click on the + Patient Education icon in the right pane.
- Select the required Patient Education with the checkboxes.
- Close the Patient Education popup.
- The selected documents in the Patient Education are added in the right pane under Patient Education.
- Click on the eye icon next to a document to open the document.
- You can also download the document via the download icon.
- You can also Print the document via the Print icon.
- Similarly, you can view, download, or print all the documents/URLs of the Patient Education in one file by clicking on the eye icon next to the Patient Education.
- Once the Note is Signed, a Patient Education document containing all added documents is automatically added to the EMR Documents.
- Allow Portal is also automatically checked i.e., the Patient Education document is also available in EMR Documents for the patient on the Patient Portal.
- Patient Education document in EMR Documents on the Patient Portal:
- An Email is also sent to the Patient if his Portal account exists.