Table of Contents
Paper Lab Flow #
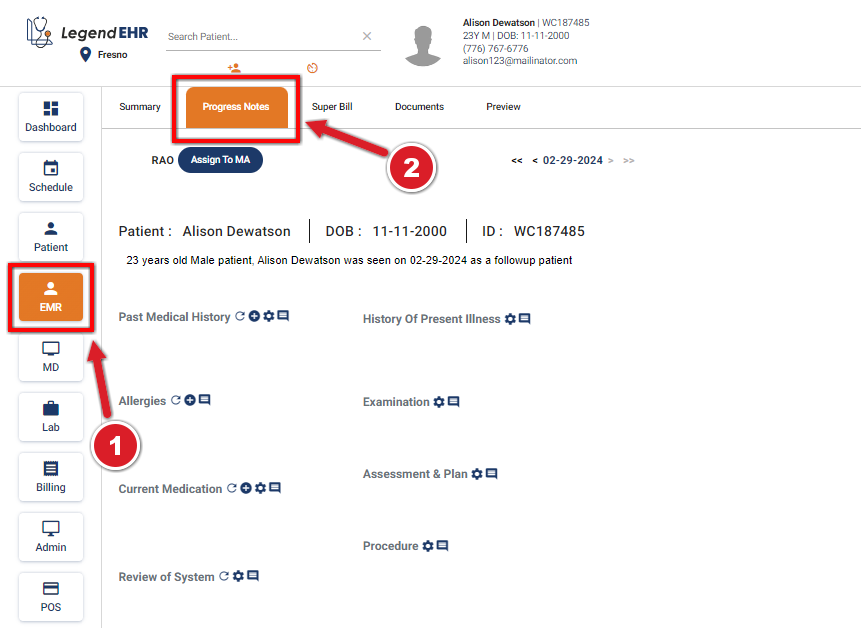
- Go to EMR
- Click on the Progress Note Tab
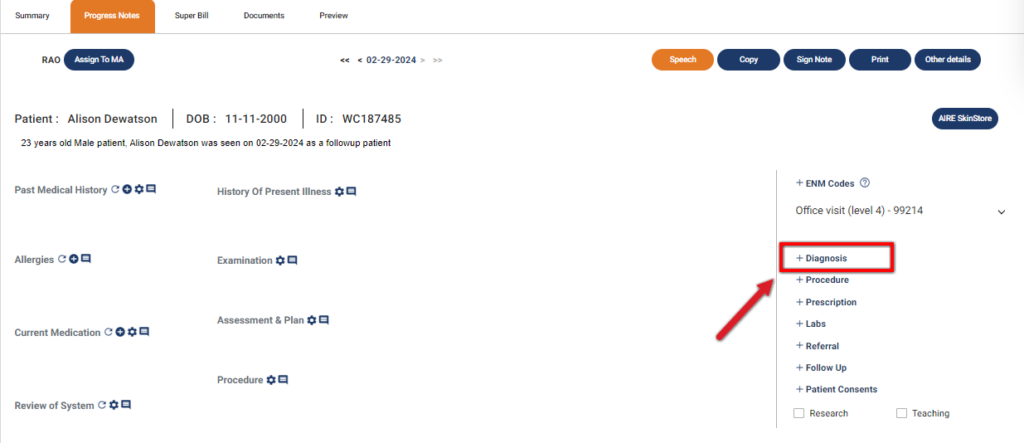
- Click on Diagnosis
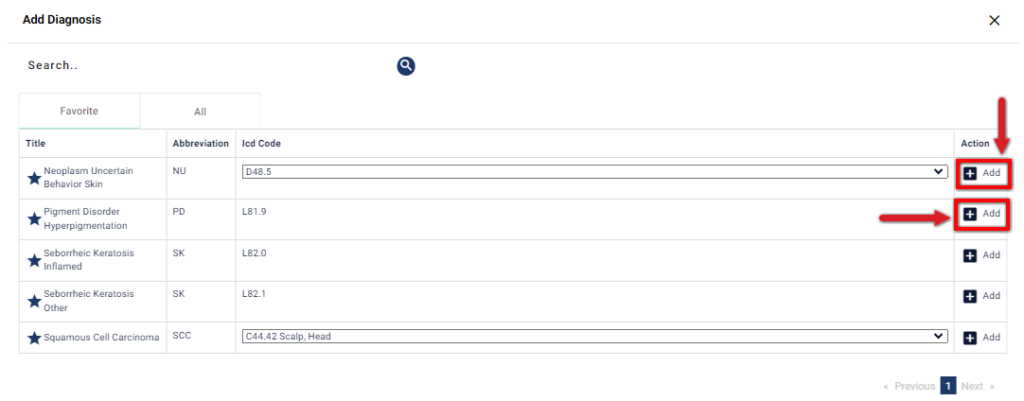
- Add Diagnosis by clicking on “+” Sign
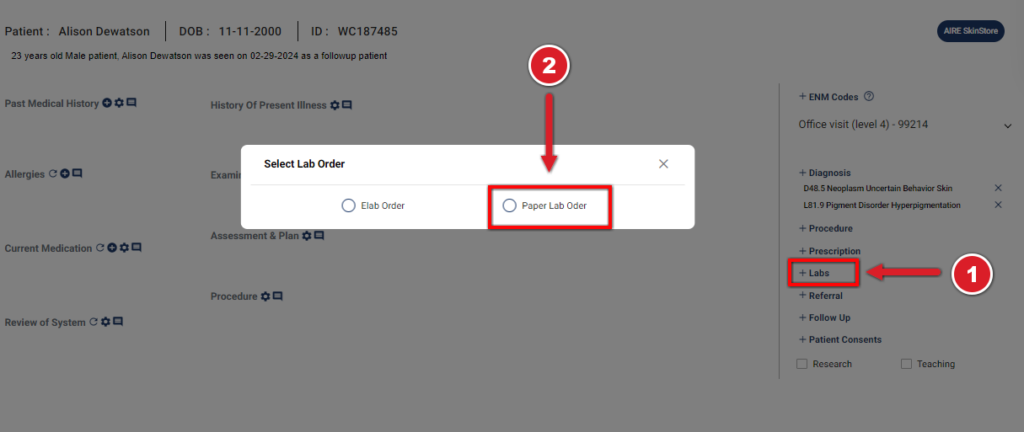
- Click on LAbs
- Select the Radio Button of “Paper lab Order”
- A pop-up will appear for entering details about the “Paper Lab Order”
- Select Lab from Drop-Down
- Select Provider
- Choose the Radio button indicating whom to bill
- When the Diagnosis is added from the Progress Note, The Diagnosis and corresponding Dx Code will automatically populate in the pop-up for the Paper Lab Order
- Enter Specimen Location
- Enter Test Code
- Select Order Date
- Enter Work Required
- Click on Save and Print Button
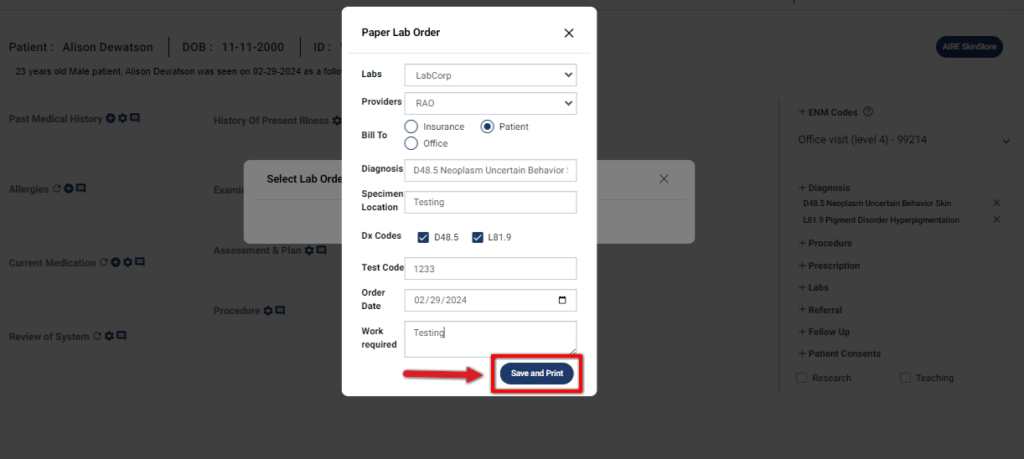
- Once you click the Print and Save button, Print Preview of the Paper Lab Order will be displayed
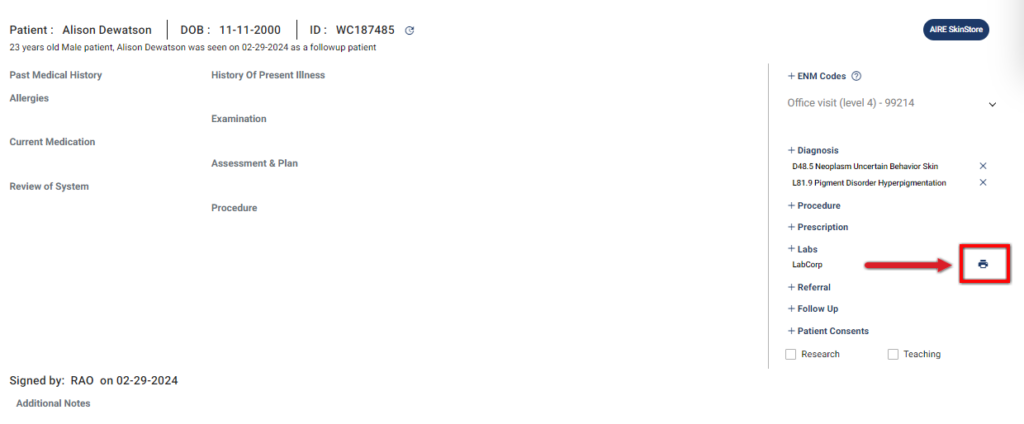
- After the creation of Paper lab order, Print Icon will appear next to your Paper Lab Order
- Click on Print Icon
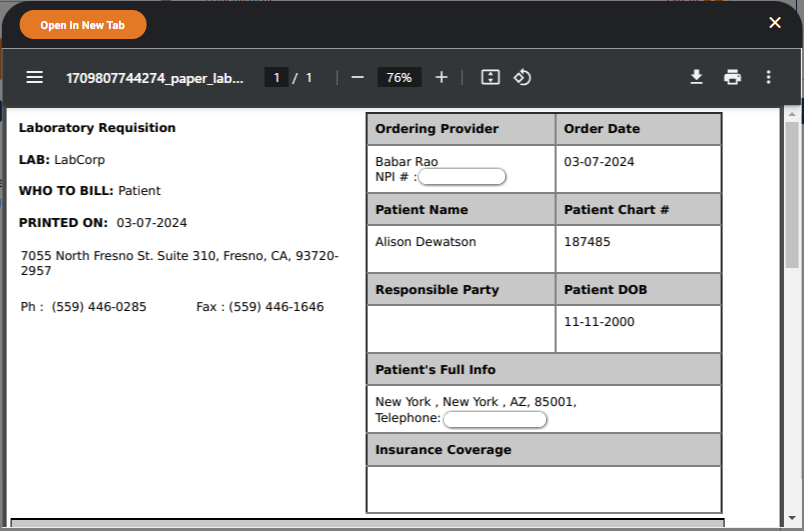
- Print Preview of the Paper Lab Order will be displayed
- You can also add your Paper Lab Order from EMR Summary
- Go to EMR Summary
- Select Lab Order From Drop Down
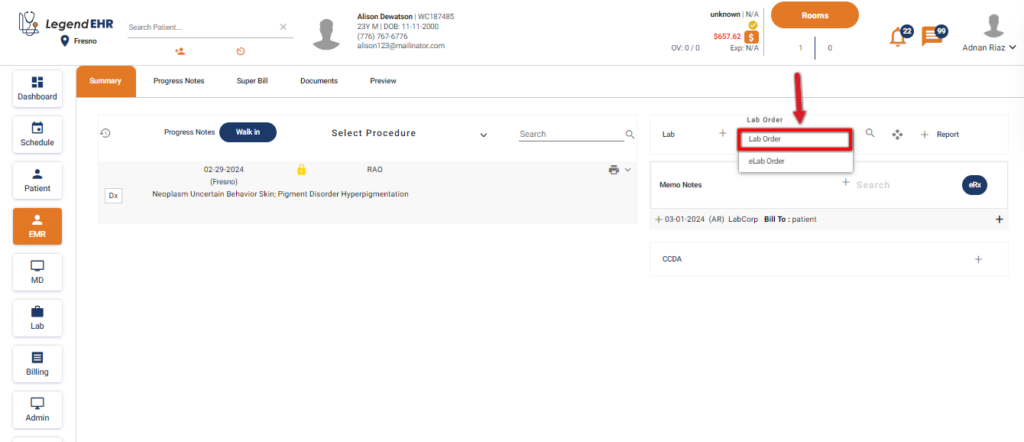
- A pop-up will appear for entering details about the “Paper Lab Order”
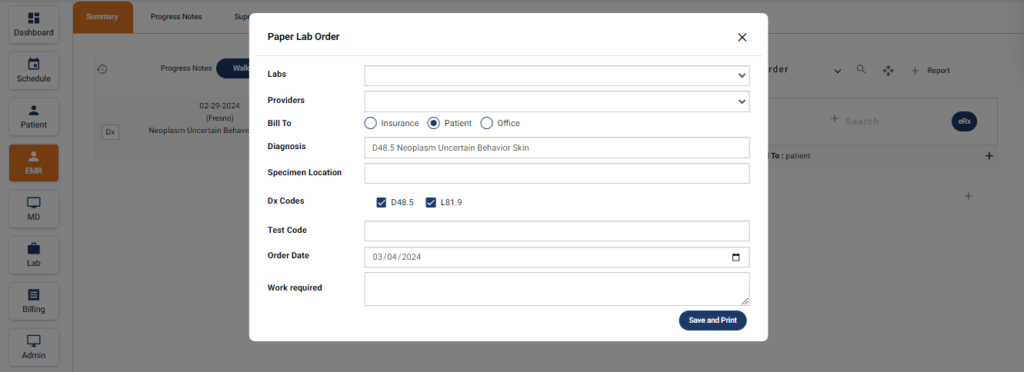
- Select Labs from Drop-Down
- Select Provider
- Choose the Radio button indicating whom to bill
- When the Diagnosis is added from the Progress Note, The Diagnosis and corresponding Dx Code will automatically populate in the pop-up for the Paper Lab Order
- Enter Specimen Location
- Enter Test Code
- Select Order Date
- Enter Work Required
- Click on Save and Print Button
- Paper lab Order will be created


