Table of Contents
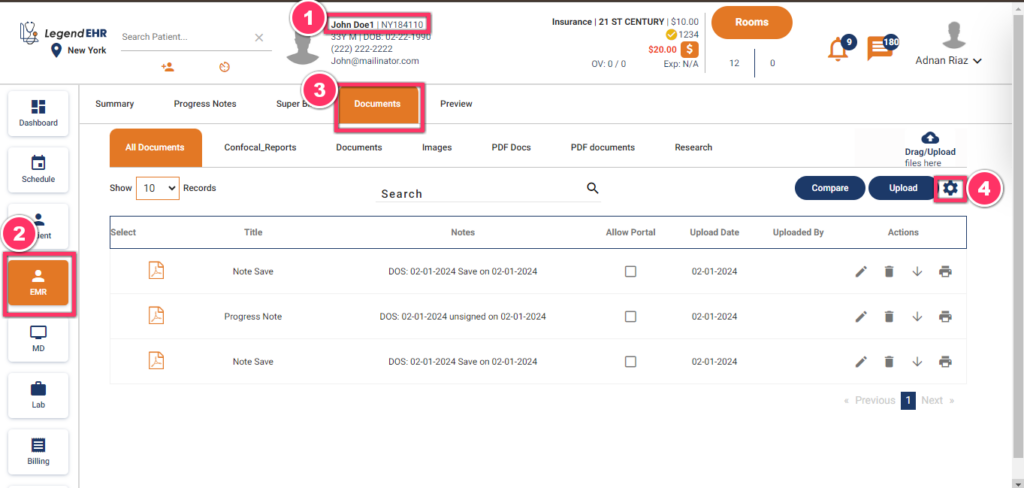
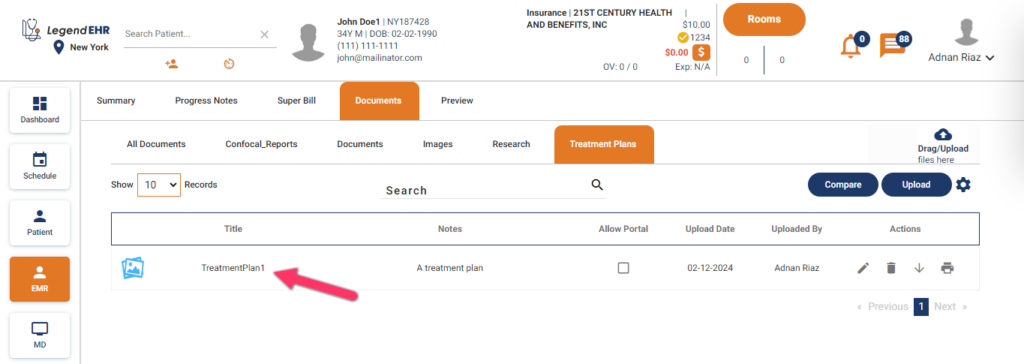
Manage Documents in EMR #
- Search a Patient
- Go to the EMR module
- Click on the Documents tab
- Click on the Manage Folder icon
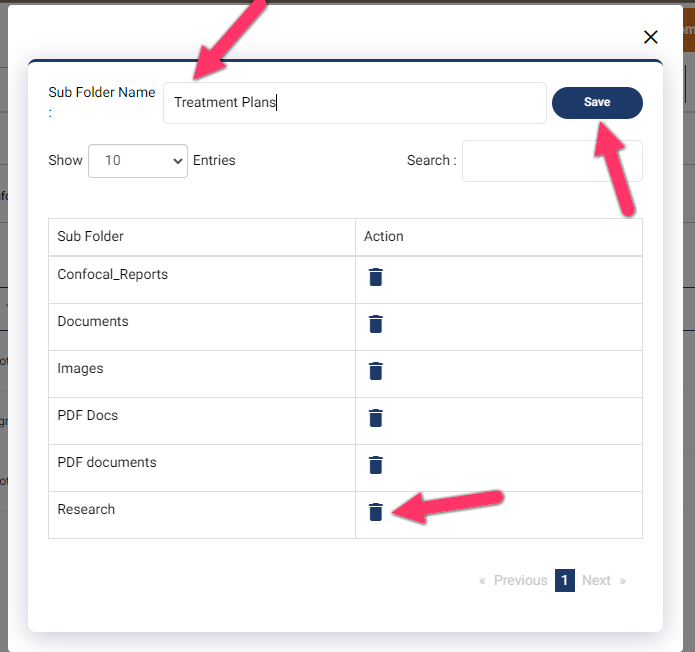
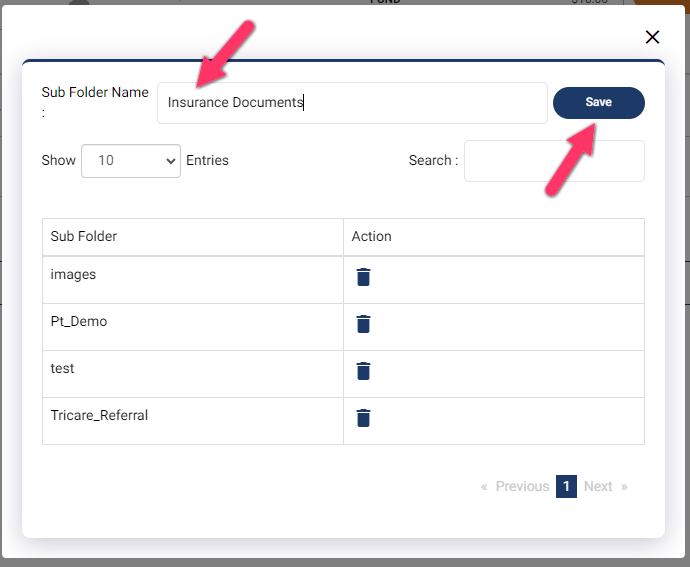
- A popup window will be opened.
- Write a Sub Folder Name to Create a new Sub Folder in the Documents tab.
- Click on the Save button
- Users can delete existing folders by clicking on the Delete Icon
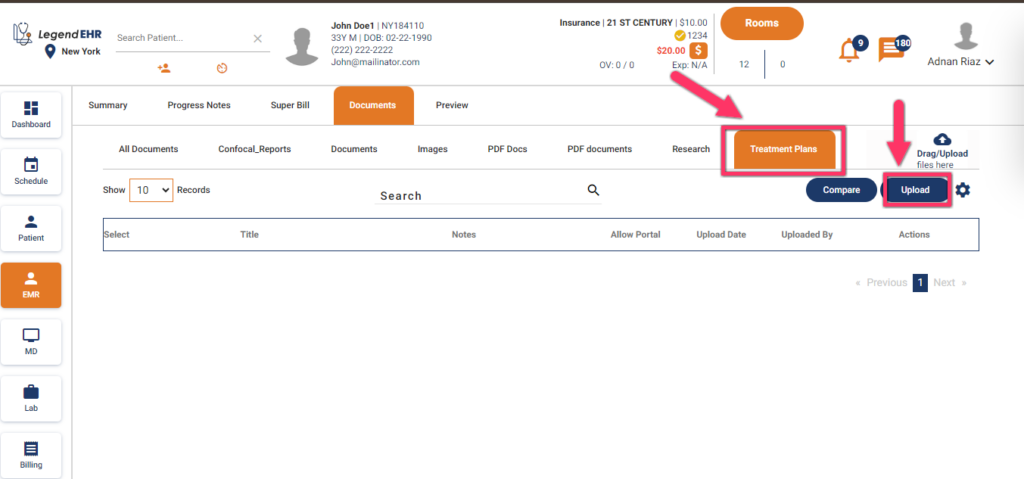
- A New Sub Folder will be Saved in the Documents.
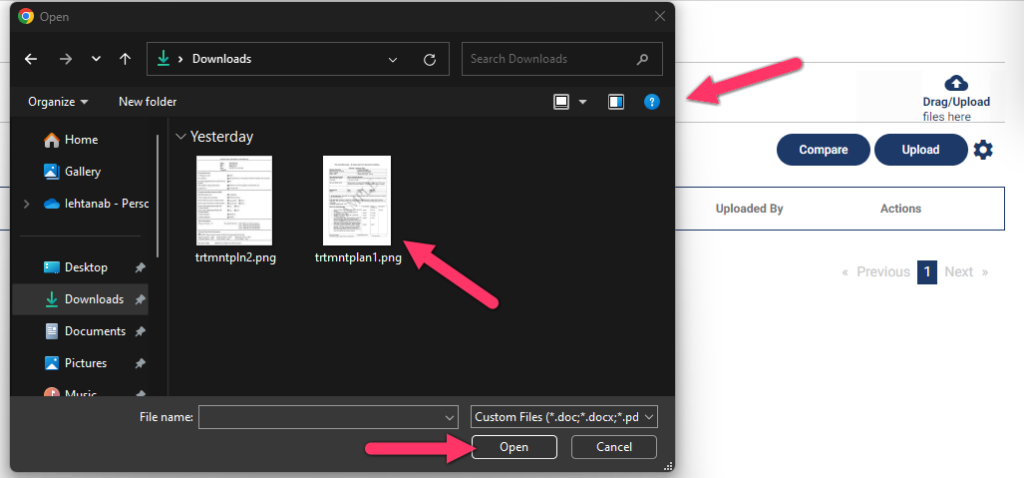
- Click on the Upload button to Upload the Documents in the New Sub Folder.
- A pop-up window to upload files will be opened.
- Select the file.
- Click on the Open button.
- A popup to add details about the document will be opened.
- Write a Title.
- Select a Document Type to default.
- Write a Note.
- Click on the Save button.

- The document will be added to the subfolder.
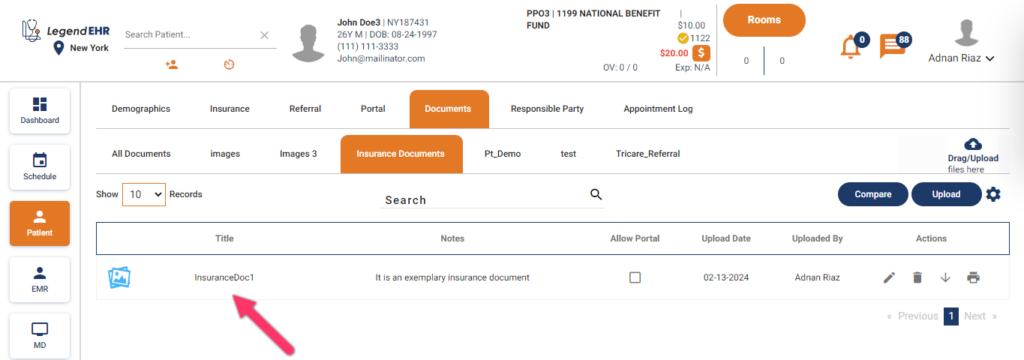
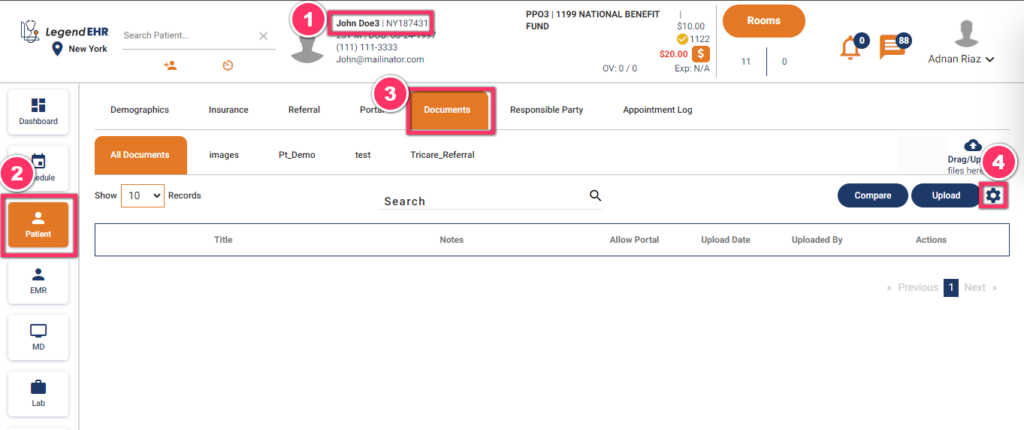
Manage Documents in Patient #
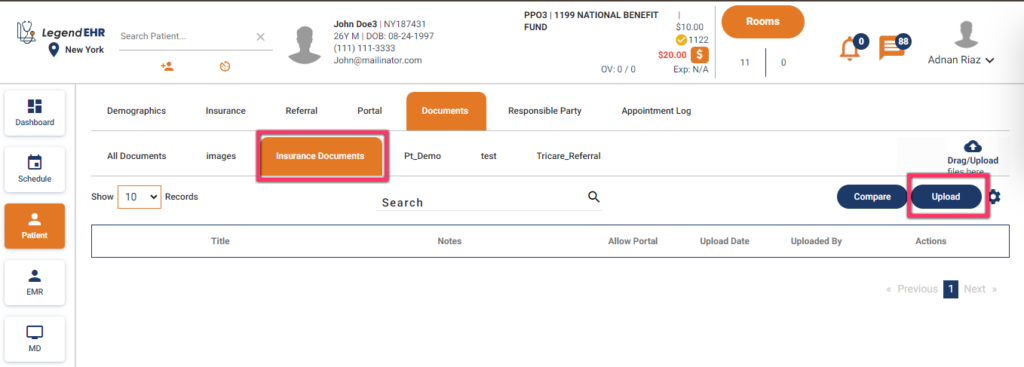
- Search a Patient
- Go to the Patient module
- Click on the Documents tab
- Click on the Manage Folder icon
- A popup window will be opened.
- Write a Sub Folder Name to Create a new Sub Folder in the Documents tab.
- Click on the Save button.
- A New Sub Folder will be Saved in the Documents.
- Click on the Upload button to Upload the Documents in the New Sub Folder.
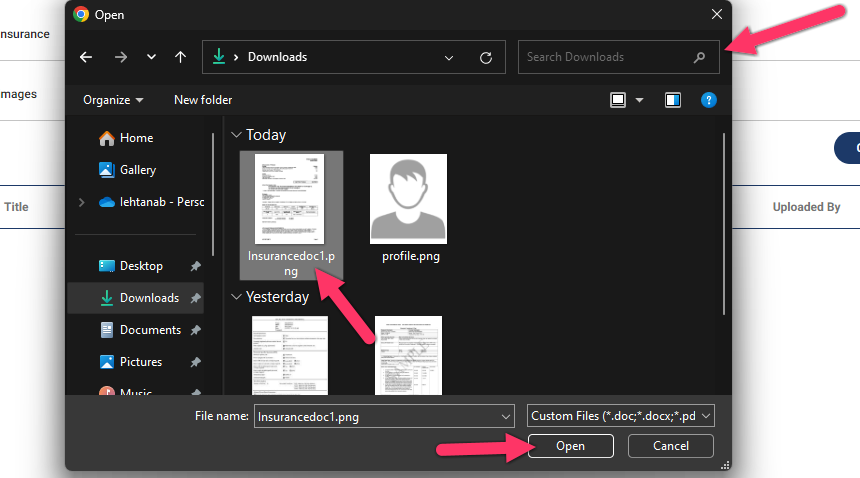
- A pop-up window to upload files will be opened.
- Select the file.
- Click on the Open button.
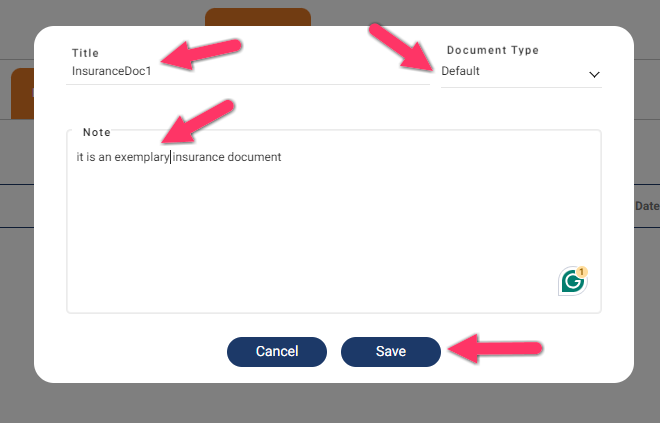
- A popup to add details about the document will be opened.
- Write a Title.
- Select a Document Type to default.
- Write a Note.
- Click on the Save button.
- The document will be added to the subfolder.