Table of Contents
Sign the Consent #
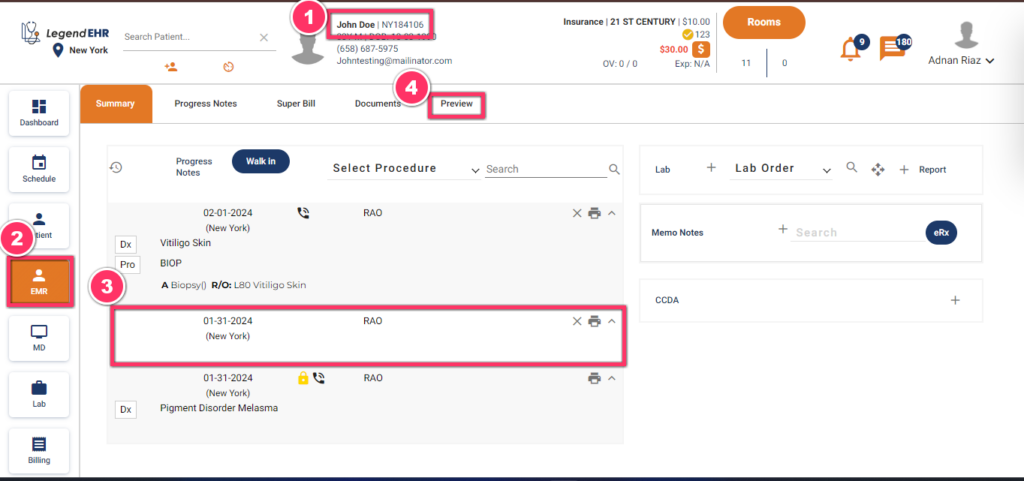
- Select a Patient by searching from the search bar.
- Go to EMR.
- Go to the Progress note against the Scheduled Appointment or Walk-in Appointment.
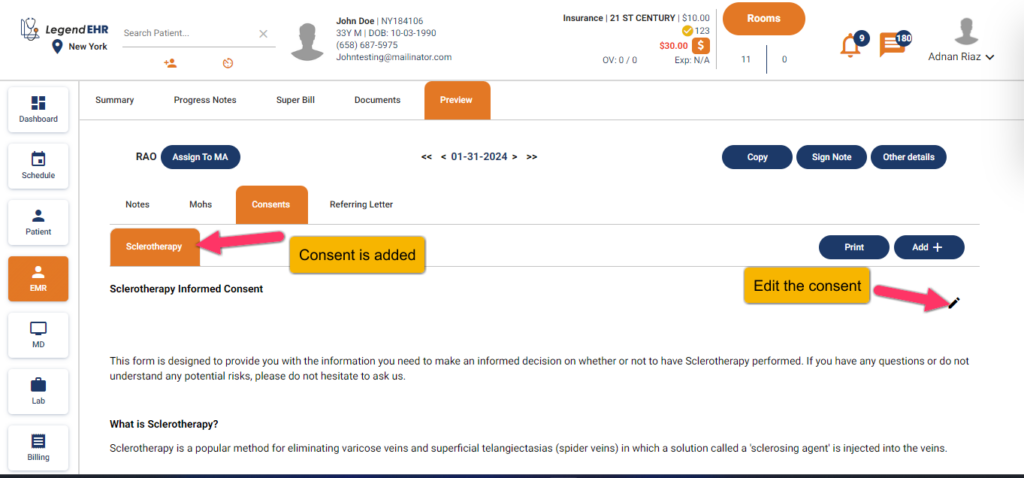
- Click on the Preview tab.
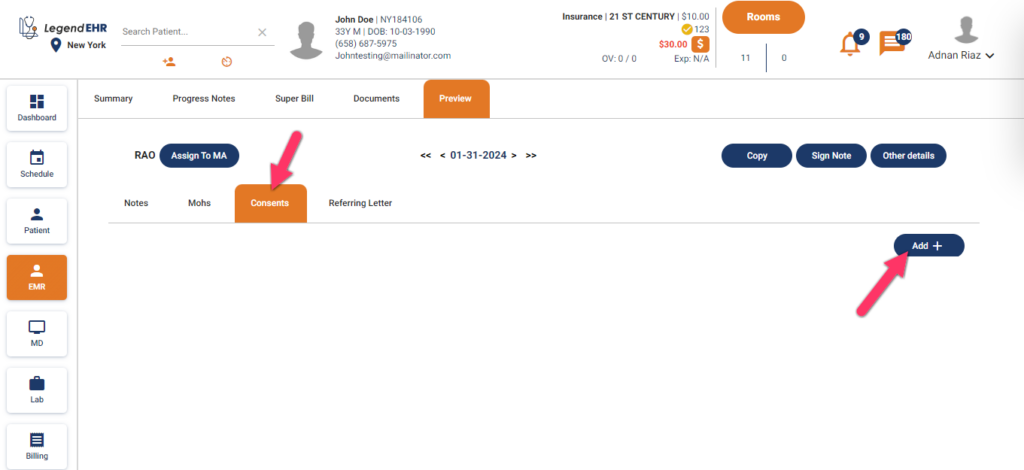
- Click on the Consents under Preview.
- Click on the Add button to add consent against the progress note.
- A popup containing different consents will appear.
- Add the required consent by checking the checkbox.
- Close the popup window.
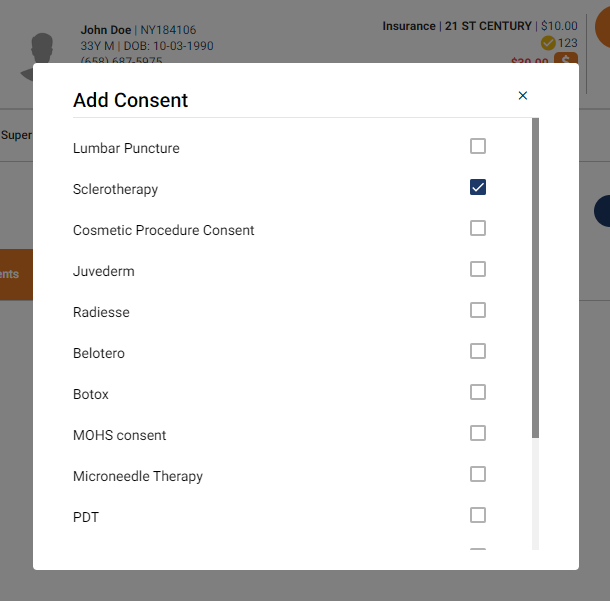
- The consent will be added.
- The Provider can Edit the consent by clicking on the Edit icon, before signing (either by the patient or himself).
- Providers can only edit the consent of their patients if it is not yet Signed.
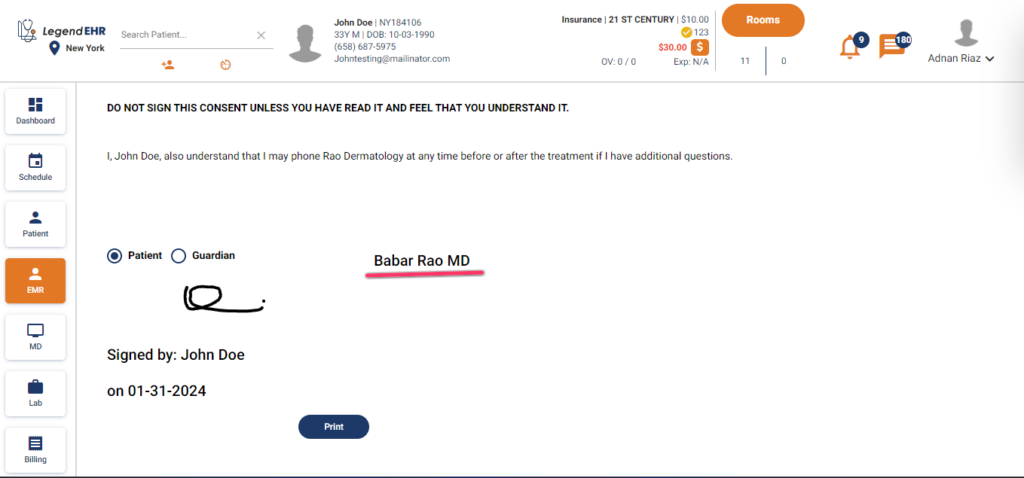
- Scroll down the added consent.
- Select the radio button for Signatures.
- Draw the Signatures.
- Click on the Sign button.
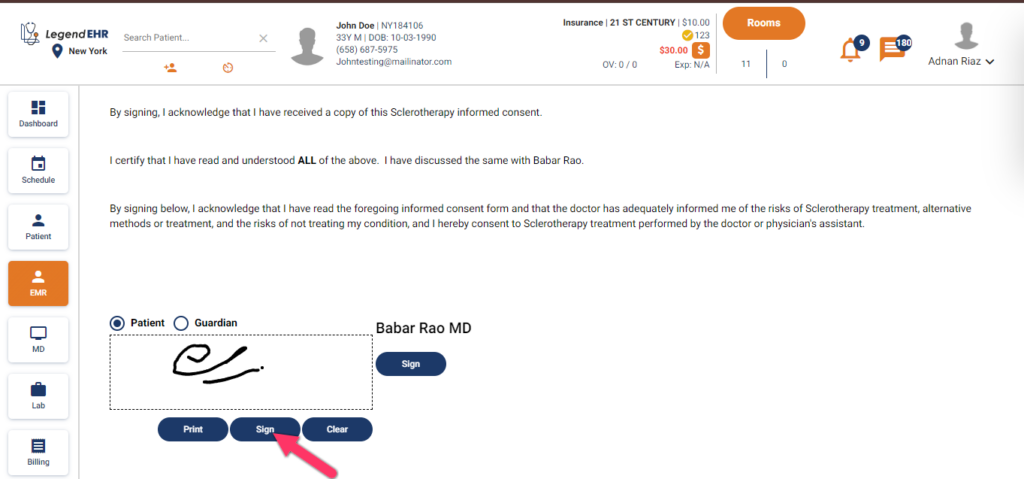
- Consent will be Signed by the patient.
- Consent cannot be edited or deleted once it is signed.
- Now click on the Sign button for Provider.
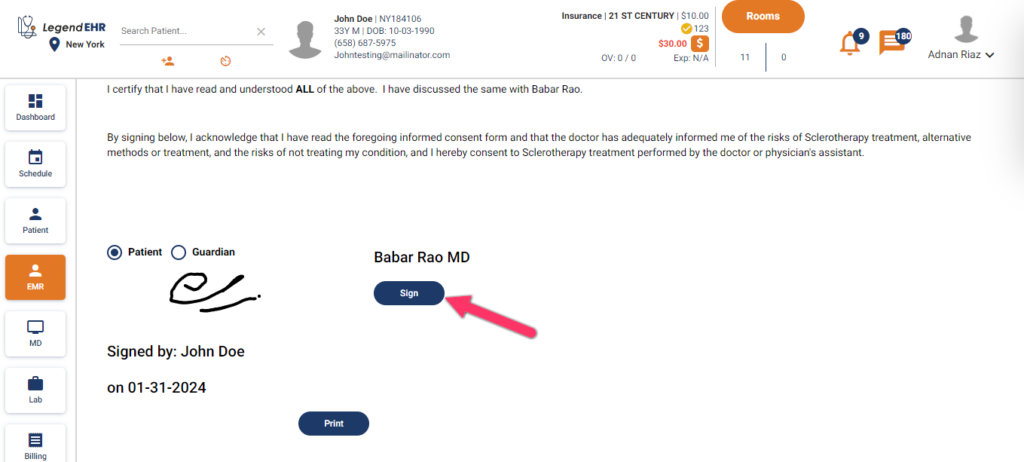
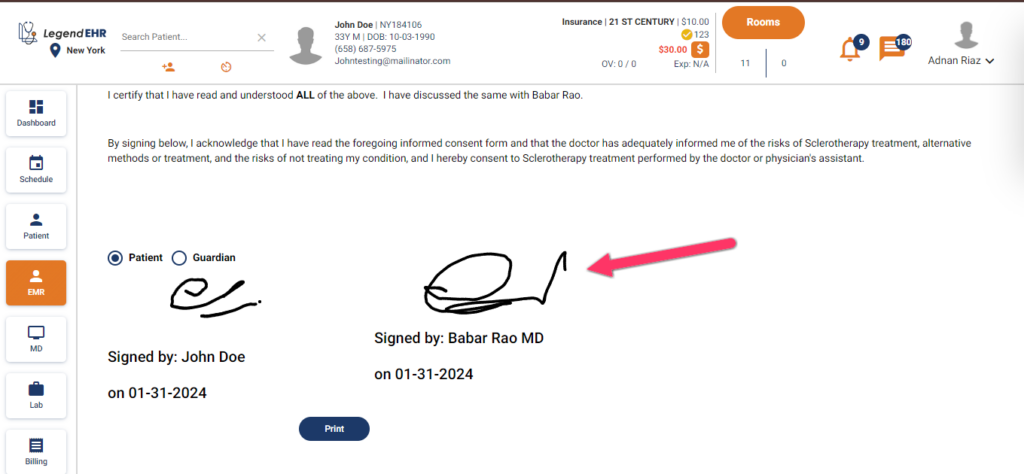
- Sign of the Provider will be applied.
- Consent is now signed by the Provider.
- If the Notes are accessed by a different user, no Sign button will appear on consent as you can see in the below image.
- Added consents can be viewed in the progress note.
- In EMR, Click on the Progress Notes.

- Scroll down the Progress Note.
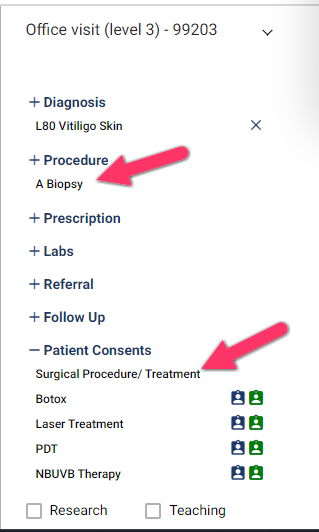
- Under Patient Consents, consents are listed.
- Signed by Patient, and Signed by Doctor can be seen from the underlined icons.
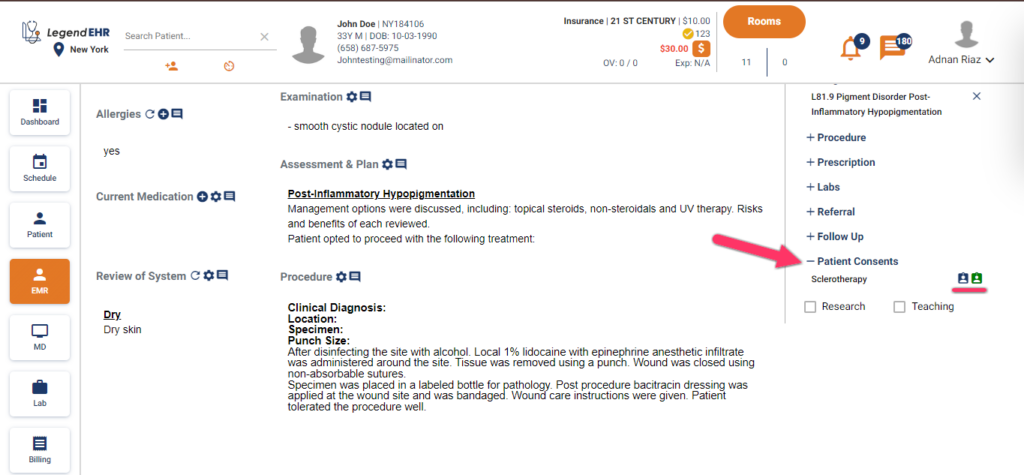
- If a Procedure is added to the Progress Note, its corresponding Consent form is auto-populated in the Patient Consents.
- It can be edited or signed in the same way as illustrated above.